23
2018
The Mindshift Exposure is a sub-$200 “storm-resistant” shoulder sling bag for DSLR and Mirrorless Systems aimed at the active photographer.
Boasting of DWR water-repellent fabric, a tarpaulin bottom, sailcloth panels, and storm flaps, the Exposure is not your average, everyday bag. It’s meant to be outside weathering the elements, doing hero-bag work. At the same time, it can also hold a 13″ or 15″ laptop (depending on whether you go with the Exposure 13 or 15), a tablet, and all the gear you expect from your typical messenger bag like pens, cables, keys, and so-on. It even has a luggage handle pass-through, allowing it to be connected to carry-on luggage.
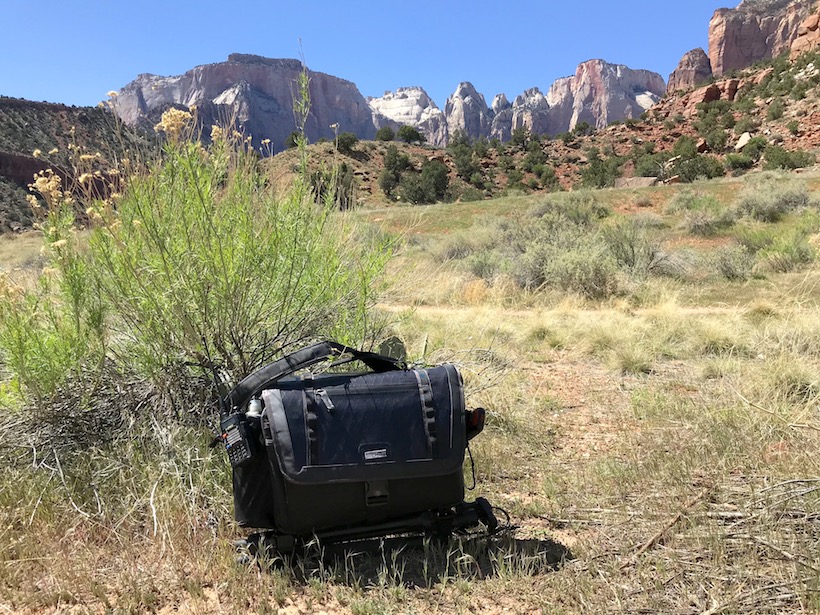
Mindshift Exposure 15 at Zion National Park
I wanted to know how good of a bag the Mindshift Exposure is, so I tested it for over a week in Zion National Park, Antelope Canyon, Horseshoe Bend, and Sedona, AZ. I used as my primary bag, tasked it with carrying all my gear for days on end, and gave it every job I normally assign to a backpack, including one I find of particular value: not killing me as I scrambled up steep climbs and narrow trails. Before we get to all that, though, let’s start with a little bit about the bag’s design.
Features and Design
The Exposure comes in two flavors: Exposure 13 and Exposure 15. As I mentioned earlier, the 13 can hold a 13″ laptop while the 15 is designed for a 15″.
In terms of capacity, the Exposure 13 is designed for:
- One ungripped body with a 24–70mm f/2.8 attached
- 2–3 extra lenses
- 10” tablet and a 13” laptop
- Accommodates 70–200mm detached
The Exposure 15 is designed for:
- One ungripped body with a 70–200mm f/2.8 attached
- 2–5 extra lenses
- flash
- 10” tablet and a 15” laptop
The walls comprising the camera and laptop compartments are thick and well-padded. Every zipper and loop feels designed to take a beating. I appreciated the external flaps protecting the camera compartment from rain. Like the rest of the bag, they have a strength to them and are not a mere marketing gimmick. The Exposure does come with a rain cover for when you need to hunker down.
Also included with the bag are tripod straps, allowing you to attach a travel tripod to the bottom, and a removable cross-body stabilization strap that keeps the bag close to you as you move about outdoors.
I liked the shoulder adjustment strap. It is a dream to work with. There’s no fiddling with stretching out a loop inside a another loop against a piece of metal to adjust the length. All you have to do to adjust the shoulder strap is flip the adjustment buckle up, move the strap, then flip the buckle down to lock it in place. The metal hardware, by the way, is anodized and thus resistant to corrosion, a nice feature if your straps are constantly in mud or puddles.
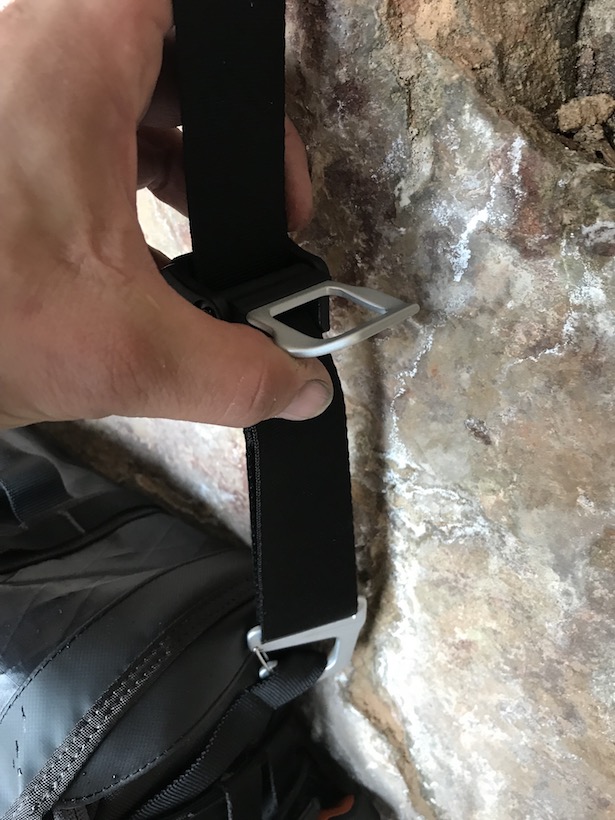
Close-up of the shoulder strap adjustment. The strap length is adjusted by flipping the buckle up, adjusting the length, then flipping the buckle back down
Another nice feature is that the bag is compatible with the Peak Design Capture Clip and the SpiderLight Camera Holster. This will allow you quick access to your camera while on the move, and I like that Mindshift included this in the design.
Beyond the notable features are some standard ones, like a mesh water bottle holder that holds most 1 liter bottles and moveable camera compartment dividers to keep your your gear from banging around during transport.
In the Real World: Zion
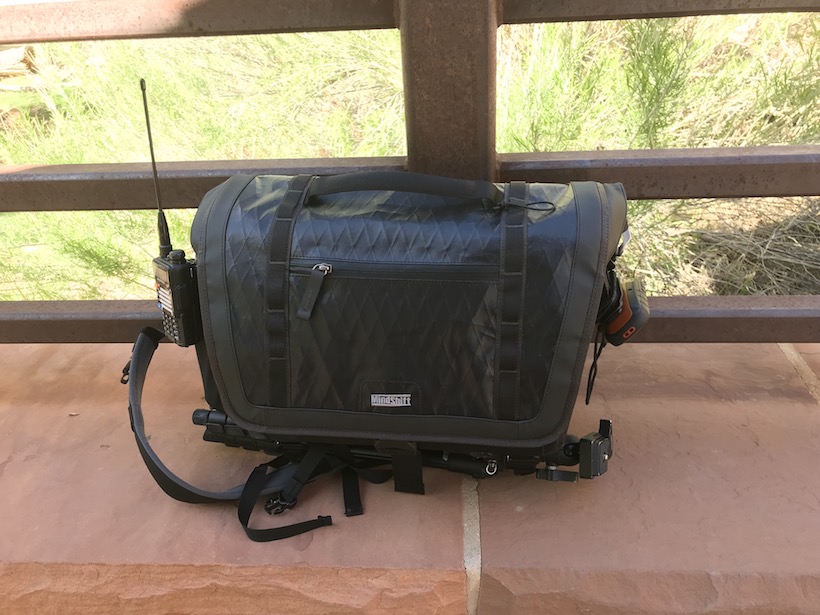
The two shots below show my load-out at Zion. I carried along my trusty Sony A7II, Zeiss 16-35 f/4, Zeiss 24-70 f/4, small first-aid kit, Vello wireless intervalometer, water bottle, walkie-talkie, Garmin etrex GPS, and my Induro travel tripod.

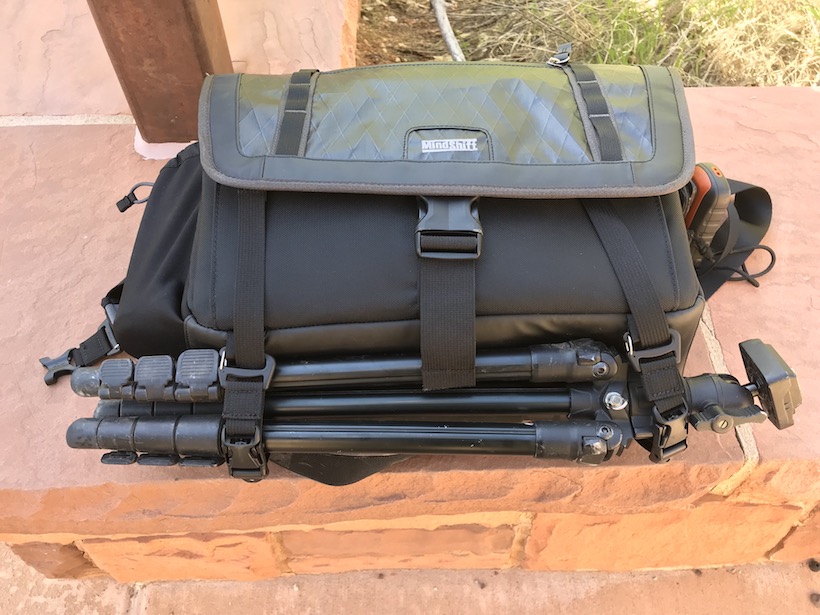
Tripod attached to the bottom of the bag. The straps have a quick-release, allowing the tripod to be easily accessed.
The bag handled the day pretty well on flat trails, steep trails, and in areas where it would be subjected to water. The one thing I was worried about was how well my shoulders would hold up with a single shoulder strap as compared to the weight balancing I’d get from a backpack. The cross-body stabilizer strap did a very good, if not exceptional, job of weight distribution and kept the strap from digging into my shoulder. On flat and medium slopes, the bag was excellent. It was well-balanced, and the stabilizer strap kept the bag close to me. I never felt like I had to reign the bag in as I turned my body.
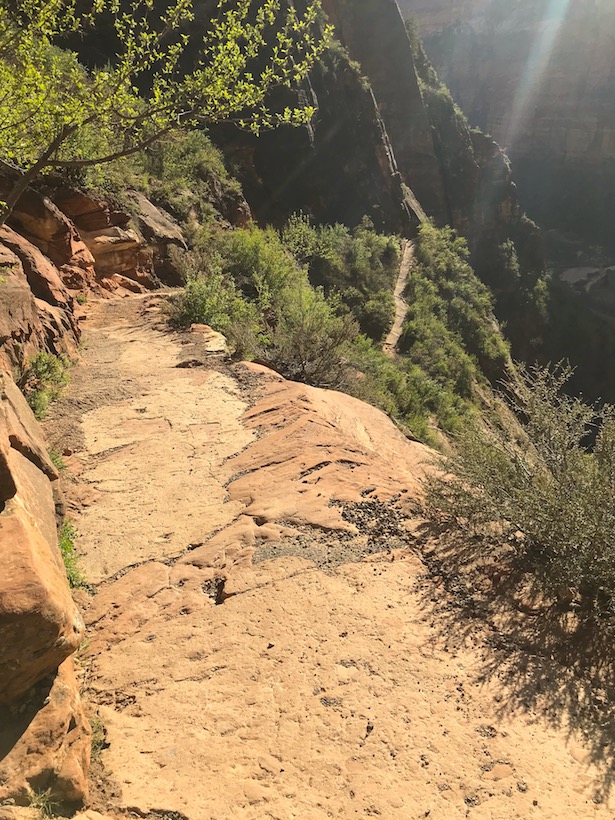
A look down the steep slope of Zion’s Hidden Canyon trail. Check out the portion of the trail on the top right of the image just around the corner from where I was standing.
The first “real” test was Zion’s Hidden Canyon trail, which goes up 850 feet in about one mile. I made the stabilizer strap work, and I have to say it exceeded my expectations. It was more than capable while heavily loaded in a difficult environment. I really didn’t expect much here, but I was surprised.
The next test was water resistance. I didn’t go mad here and jump into The Narrows with it, but I did take it to Zion’s Weeping Rock and let it get a bit of time under water. Water is definitely not a big deal. The fabric easily handled running water with no issues.
In the Real World: Antelope and Horseshoe Bend
Days 2 and 3 with the Exposure were spent running around Page, Arizona shooting at Upper Antelope and Horseshoe Bend.
The load-out:
- Sony A7II, Zeiss 16-35 f/4
- Sony A6000 with Zeiss 24-70 f/4
- Batteries, first aid kit, water, Rocket Blower, Blackrapid strap, an intervalometer, and Sony IR remote
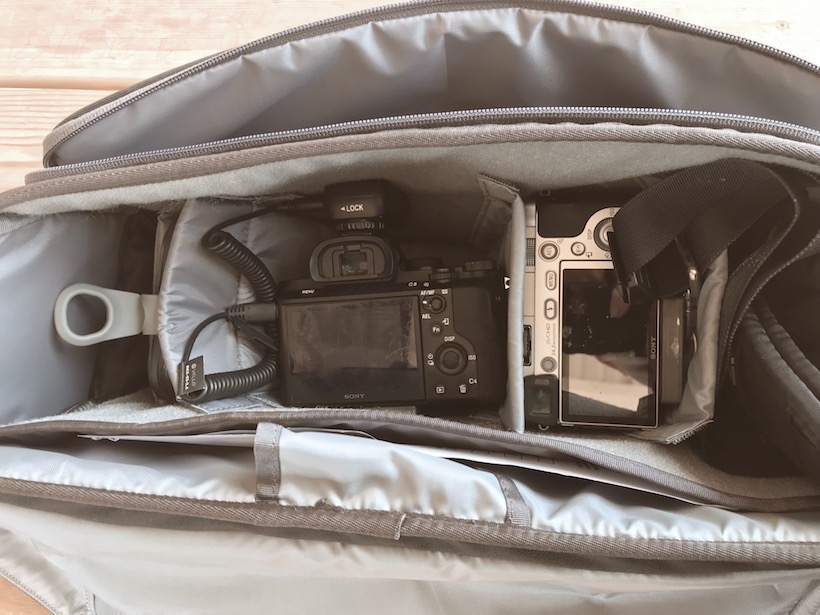
Sony A7II with Zeiss 16-35 f/4 and A6000 with Zeiss 24-70 f/4
Man, was I glad to have both a wireless and an IR trigger that day! There’s nothing like showing up at Upper Antelope and finding out the cable on your trigger is no longer working. Have a backup!
Ok, back to the bag. I used the Exposure to tote all my gear while in the 4×4 at Antelope and go on the short walk/hike to the Horseshoe Bend observation point. The bag was a pleasure to use. This was its sweet spot: outdoor/adventure work in short- to medium-duration outings. It was fantastic, because it’s a lot smaller than a backpack and has a significantly lower profile. It’s sleek and stays close to your body. You can run with it if need be. It’ll bounce a little, but I found that to be minimal, especially compared to a typical shoulder bag.
I have to say this was an easier outing compared to Zion and significantly easier than what was to come at Sedona.
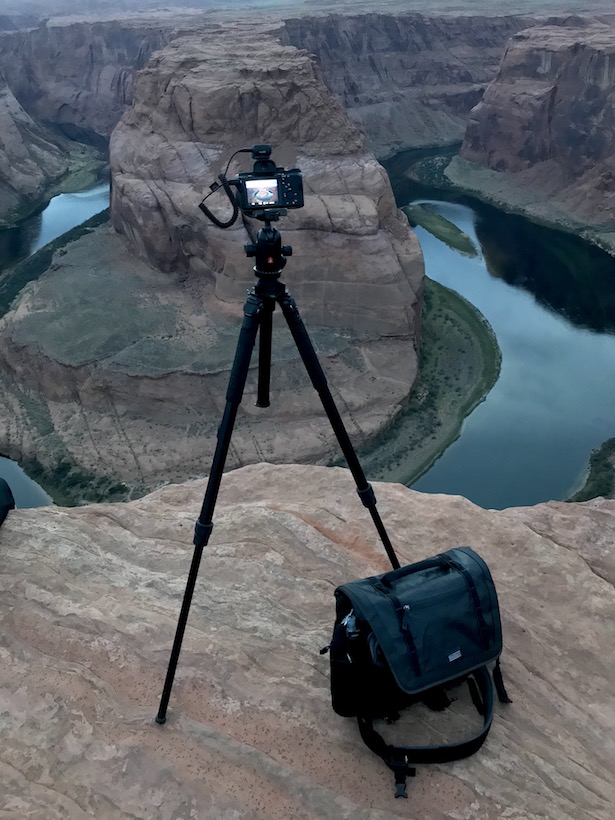
Shooting Horseshoe Bend
In the Real World: Climbing Sedona’s Bell Rock
Your everyday messenger bag would be a hazard at Bell Rock, as it would be constantly shifting from side to side. Bell Rock is not Zion’s Angel’s Landing, but it does have some steep drop-offs and can be deadly if you’re not careful. It is definitely where you would typically use a backpack, but the Exposure 15 is what I took with me for the scramble up.
I used my typical load out here: Sony A7II, Zeiss 16-35 f/4, and Zeiss 24-70 f/4. The bag handled the terrain very well. It never shifted or affected my center of balance. It did what it needed to do: stayed out of my way as I climbed and gave me quick access to my gear when I stopped to shoot.
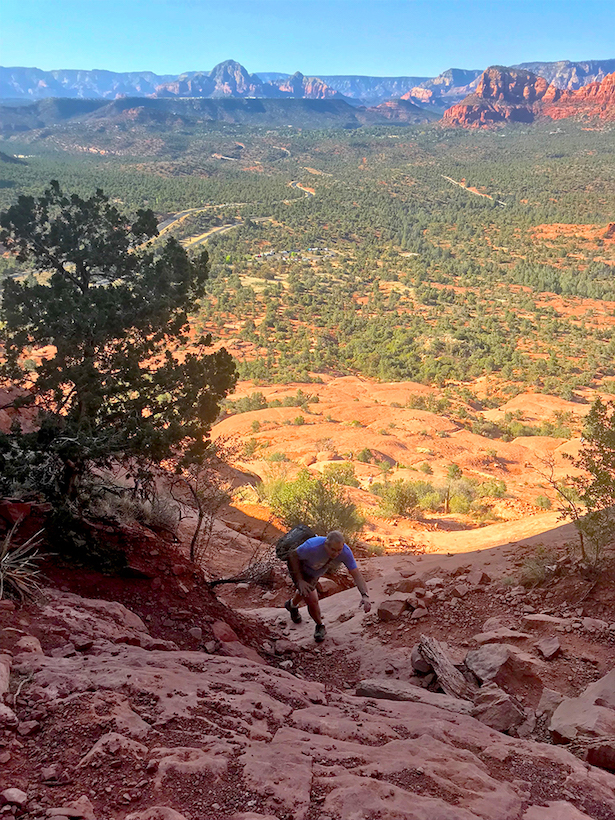
Climbing up Bell Rock is a lot of fun, but you do need to keep your eyes on where your feet are going.
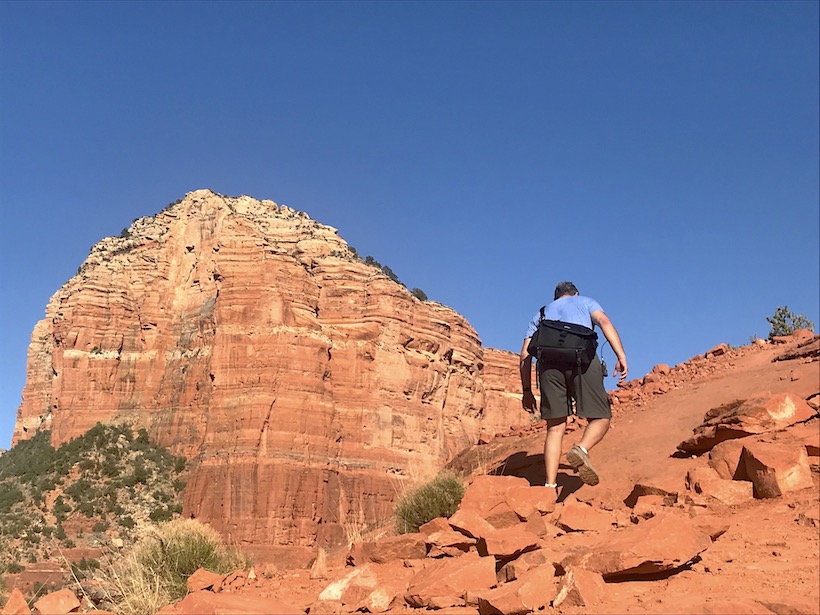
You can’t beat the views on the way up.
Field Notes
The following are a few notes I collected as I used the bag. They’re good things to keep in mind if you’re considering the Exposure:
- The cross-body stabilizer can be moved, allowing the bag to be used on the left or right.
- The camera holster pad (for the Peak Design capture clip or Spiderlight holster) is on the left side of the bag and will allow access to the camera when the camera is on your right shoulder. It is difficult to get to the camera when using the cross-body stabilizer if you carry the bag on your left shoulder.
- The water bottle can be difficult to get to when using the cross-body stabilizer when the bag is on your right shoulder, as the bag is designed to not move much when the stabilizer is in use.
- I’d love to see a business card slot I can slip my card into in case the bag is ever lost.
Overall thoughts
Mindshift has made a great bag. The Exposure is small, light, and remarkably stable, even when used on hikes or climbs. Its sweet spot is short- to medium-range hikes. Keep in mind you’ll have a limited amount of water with you when using the Exposure. It’s not designed to be an all-day hiking bag but rather a versatile shoulder bag for outdoor work. If that’s what you’re looking for, get the Exposure. It will serve you well.
Where to buy:
p.s. Here’s quick shot of Antelope. I’ll be getting more images up on Instagram in next few days.


