Sep
04
2014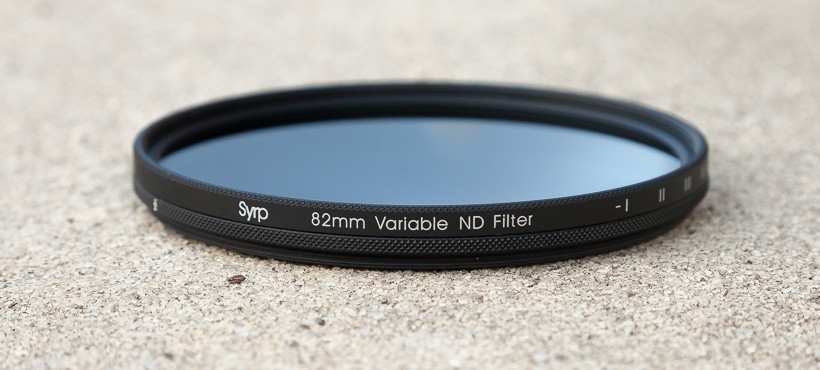
Syrp is one of those companies you’re happy to see succeed. Just take a look a Syrp’s team and how they describe themselves in their contact page to get a sense of the Syrp mindset: just plain cool. The company started with a successful kickstarter campaign to launch the ambitious, yet well-implemented, Genie Motion Control Time Lapse head. Not being content to just stay still, though, Syrp recently introduced two new products: the Magic Carpet Slider and the Variable Neutral Density (ND) filter.
I’ll get to the Genie and Magic Carpet Slider in upcoming posts. Today, we’ll be looking at Syrp’s ND filter.
What is it & A little bit of background
Constant and variable ND filters have been used in astronomy, cinematography, and photography for some time. Ask any amateur astronomer how they attenuate (i.e. reduce) the full moon’s light, and they will reach into their bag and show you a small variable neutral density filter. Cinematographers use ND filters to allow for shallow depth of field shots during the day, and photographers use them to create a sense of motion in brightly lit scenes. Ever lamented your inability to use a slow shutter speed to photograph a waterfall at mid-day? You would have been able to if you had a neutral density filter.
How Neutral Density filters work
Variable NDs are comprised of two polarizing filters stacked on top of one another. A polarizing filter, as you may know, works by blocking incoming light at 90 degrees to the filter. Stack two filters on top of one another at 90 degrees, and they can block out a significant amount of light. In the case of the Syrp variable ND filter, that amount of light varies from 1 stop (i.e. ½ the light) to 8.5 stops (i.e. 17 times less light) depending on the relative angle of the two polarizers to one another.
Think of it this way: if the relative angle of the two filters is zero, you get the minimum attenuation. Conversely, at 90 degrees, you get the maximum attenuation. Stated simply, you turn the variable ND filter one way you get less light; turn it another, you get more light.
Variable vs Constant Neutral Density Filters
Sounds great, so why aren’t all ND filters variable? Why do manufactures even sell constant filters? The reason for this is making a good variable neutral density filter isn’t easy. Variable ND’s are susceptible to color shifts. If not done right, a variable ND’s color shift can vary widely across the rotation range. On one end of the rotation you might get a blue-red shift, while on the other, you get a green shift. That said, even constant (i.e. non-variable) neutral density filters, have color shifts. But, those color shifts are, as might be expected, constant (for obvious reasons.)
Additionally, keep in mind a variable ND stacks two pieces of glass on top of one another in front of your lens. If the materials and craftsmanship aren’t top-notch, a discernable loss of sharpness can occur- often in the corners, but also in the center of the frame.
Large Vs. Small
Syrp created two versions of the ND filter: large and small. The small filter is 67mm and comes with step-up rings for 52mm and 58mm lenses. The large filter is 82mm and comes with step-up rings for 72mm and 77mm lenses. Both filters come with a sweet leather case (seriously, it’s a thing of beauty) and a cleaning cloth. Pricing is $139 for the small filter and $189 for the large filter.
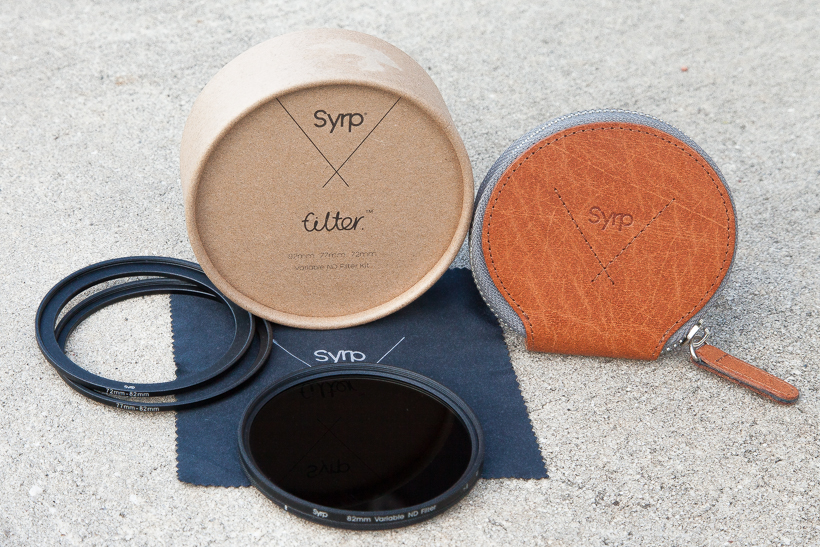
The Syrp Variable ND Filter: everything in the box
Color & Sharpness
I was impressed with the filter’s optical performance. The Syrp Variable ND shows a consistent, and well-controlled, green color shift. I was expecting a lot more variance out of a filter at this price range, but it wasn’t there. Also, the shift is consistent across the rotation range and is easily correctable in Camera Raw or Lightrooom (i.e. you don’t get a blue shift on one end, and a green shift on the other). This is a big deal, because the last thing you want to do is color-correct for every little turn of the filter you might have made during your photo session. I also didn’t see much vingetting; that was a real surprise.
The image does get a bit softer at 8.5 stops than without the filter, but it is usable.
Take a look a the series of images below comparing an image taken with no filter vs images taken with the Syrp variable ND filter at various stops. Drag the slider to see more of either image. The last image you see in the series is a color-corrected image taken with the Syrp filter at 8.5 stops. Note: all the images were taken on a tripod within a few seconds of one another.
No Filter vs Syrp Variable ND at 1 stop
[twentytwenty]


[/twentytwenty]
No Filter vs Syrp Variable ND at 3 stops
[twentytwenty]

[/twentytwenty]
No Filter vs Syrp Variable ND at 5 stops
[twentytwenty]

[/twentytwenty]
No Filter vs Syrp Variable ND at 8.5 stops
[twentytwenty]
 [/twentytwenty]
Image taken with the Syrp Variable ND at 8.5 stops – quick and dirty color correction in Lightroom.

Using It
The stops are clearly defined on the filter as I, II, III, IIII, IIIII, IIIIII, IIIIIII, IIIIIIII, IIIIIIII+ (the last being 8.5 stops). I like that the stops are demarcated, but I think the single notches can be hard to read after about 5 stops. It’s not a big deal, as I was able to tell what stop I was at. But, part of me wonders if it wouldn’t have been easier to just use digits.
Also, while there’s a small indicator dot to line up the stop to, it’s not clear whether I should be aligning the first “I” or middle “I” to the indicator. It would have been great to have a dot to show me where to align for a particular stop.
The stop marks and the indicator are minor quibbles. It’s really not hard to sort out what stop you’re at. Besides, what you’re really looking for when using an ND filter is a target shutter speed. You’re just spinning the filter until you get to your desired shutter speed. Do you really need to line up an indicator to a dot? No, you don’t.
I did have a bit of stickiness with the step-up ring to my Canon 77mm lenses. However, I never had to use a filter wrench to remove the filter. The filter motion is smooth.
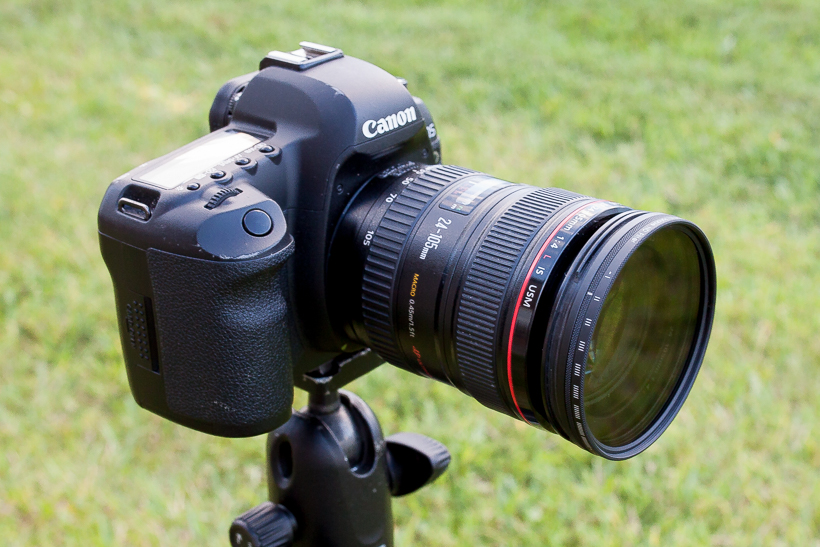
The filter mounted on my battle-scarred 24-105f/4L
Should you buy it
Some minor notes on numerals and stop indicators aside, the Syrp Variable ND filter is a strong performer. It shows a consistent, well-controlled, and manageable color shift across the rotation range while still yielding a sharp image. That’s a lot to pack into a sub- $200 variable ND.
At $139 for the small and $189 for the large filter, the price is well below comparable filters from B+W and Singh Ray (where you’ll be spending $300 and up). All-in-all, you get good optical performance at a decent price. Besides, you’ll really want that filter case!
Where to buy
B&H: Syrp ND Filter – Small
B&H: Syrp ND Filter – Large
Aug
26
2014
What is it?
Let me start with what a hyperlapse is (in case this is the first time you’ve run across the term.) At its most basic form, a hyperlapse is a timelapse with motion. When I say motion, I don’t mean panning, tilting, or moving the camera on a track: that kind of motion does not a hyperlapse make. A hyperlapse involves significant motion through an environment with the camera moving across multiple axes simultaneously. Hyperlapses are awesome, but creating one usually requires you to use a tripod, some fancy camera gear, and Adobe’s AfterEffects or Premiere with the Warp Stabilizer plugin. In short, you can’t create a hyperlapse on the cheap. Well, you couldn’t: until today that is. Today creating a hyperlapse is free thanks to Instagram!
Instagram just released a Hyperlapse App for iOS (I’m sure an android app won’t be far behind). What’s interesting about the app is this: while video stabilization normally requires a heavy amount of processing power, Instagram’s Hyperlapse correlates the iPhone’s gyroscope motion data with the captured video to cancel out motion (aka shake).
It actually works really well. Check out the video I created with it today:
Like
The app is dead simple. All you see when you open it is a record button that’s it. You hit the button to record and press it again to stop. When you hit stop, you’re asked how much you want to accelerate the video. You can choose from 1x to 12x. You also get a button to confirm or cancel. What’s cool is you get a preview of what the accelerated video looks like. Once you confirm you can then share the video to Facebook or Instagram, or you can save it to your phone.
It’s really a breeze to do. Just keep in mind: you don’t get any audio.
No Like
No YouTube or Vimeo sharing? I sort of understand Instagram/Facebook wanting to keep users within its walled garden, but it just doesn’t feel right not having sharing out to YouTube or Vimeo.
Also, if you happen to get a phone call while using the app, it locks up and becomes unusable. You have to kill the app and start over. Perhaps this is just specific to my phone ( I’d be curious to see if others are seeing the same thing.)
Should you Get it?
YES! First it’s free. Second, it’s simple. While it’s not perfect, it’s a lot of fun to use. I’m going to tool around Orlando with it and play around.
Here’s Instagram’s release video for Hyperlapse:
Aug
25
2014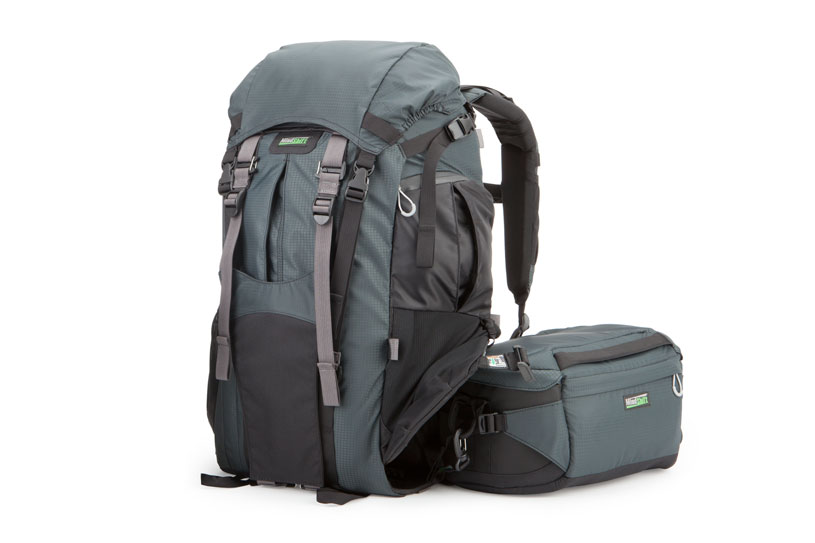
A consumer grade camera shoulder bag or backpack may be all you need for a day running around a city or perhaps while on a short nature walk. Getting your gear to a shooting location over difficult terrain, however, brings about a set of challenges an everyday camera bag just isn’t designed for. Chief among these are weight distribution, easy access to your camera, and sufficient storage space for your lenses, as well as, all the equipment you’ll need for a day or two off the grid – not to mention all the odds and ends we all have in our camera bags. Not only would a regular camera bag’s durability be in question, but so would its ability to protect your gear and give you the room you need.
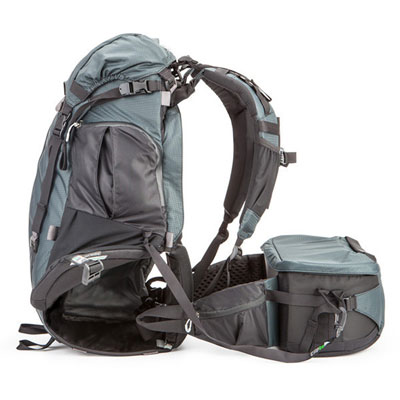
Enter the Mindshift Gear Rotation 180 Pro: a camera bag and hiking backpack all rolled into one designed specifically for the landscape photographer/adventurer. It features a unique two-compartment design comprised of a top section for storage and a belt pack to hold your camera. The belt pack, stored curiously inside the top compartment, can be rotated around to the front after unlatching a magnetic (arguably magical) latch (hence the name: Rotation 180).
Design: as a Camera Bag
The magical door latch
A rotating bag with a magnetic latch that fits inside another bag? It sounds like a recipe for disaster but it works brilliantly. Rotating out the belt pack starts with unlatching the door holding the belt pack inside the main bag. The latch is nothing short of amazing. You can unlatch the door with one hand and you don’t have to take the bag off your back to do it. All you need to do is reach around and slide the latch out. There’s no buckling/unbuckling or snapping apart or together.
Belt pack rotating in and out of the Mindshift Gear Rotation 180 Pro
Incredibly, you can close the latch back up with one hand (again while still wearing the bag). All you need to do is get the latch near the holder and it snaps back into place courtesy of the magnet incorporated into it. Not only does the latch close back up, but it’s also built in such a way that secures it together so it can’t unlatch on its own. It’s so easy I’ve even latched and unlatched the door while on the move (something you appreciate when you’re in the woods and want to put your gear away in a hurry)
Mindshift also designed the beltpack so it can even be rotated in and out even while the Rotation 180 Pro’s rain covers are on (there’s a rain cover for the main bag and one the belt pack). What all this adds up to is this: getting to your camera is easy; you don’t have to stop what you’re doing to get to it.
Careful design touches abound. The door holding the belt back in is spring loaded so you don’t have to move it out of the way after unlatching; it does so on its own. Mindshift was thoughtful enough to consider the possibility of you rotating the belt pack out without having it buckled around your waist. Without the belt back secured, it’s possible for it to fall to the ground. For this, Mindshift incorporated a safety clip-in strap connecting the main bag to the belt pack. If you do forget to have the belt pack buckled when you rotate it out, it won’t be able to fall. Also, the the straps holding all the zippers on the bag incorporate a hard plastic loop making them easier to open.
 Design touch: safety strap between the main bag and the belt pack |
 Design touch: hard plastic around the zipper loop |
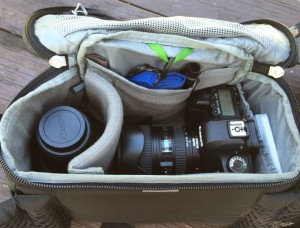
While two lenses are usually enough for me, the belt pack can easily hold at least one more lens
Belt Pack Capacity
Ok, the door and latch are amazing but does the Rotation 180 Pro have room for your gear? The belt pack can easily carry a pro DSLR body with a 70-200 attached providing the hood is reversed. On a recent trip, the bottom compartment held my trusty 5DMKII with the 24-105mm F/4L attached (hood reversed) in conjunction with the 17-40mm f/4L and my Sigma 35mm f/1.4 A series lens. The image on the right shows my typical load-out: the 24-105 f/4L and the 17-40 f/4L.
The belt pack has a top pocket on the interior perfect for an intervalometer/shutter release and a battery. The inside of the pack has a pocket you can use to hold a polarizer and a few other odds-and-ends like memory card holder or camera strap). The front of the pack has a pocket that holds the belt pack rain cover.
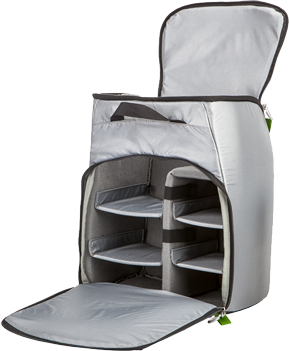
r180 Pro Insert allows you to carry a 2nd camera and lenses in the top compartment
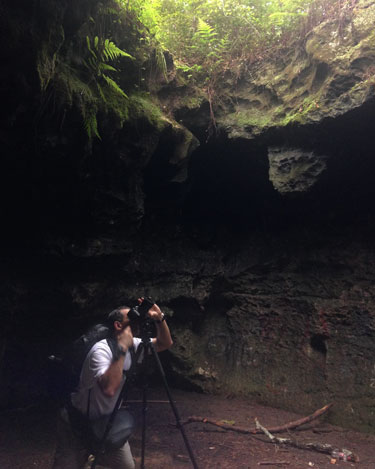
Here I was inside a cave using the Rotation 180 Pro
If you need more gear, you can spring for the optional ($59.95) r180 Pro Photo Insert. The insert will allow you to easily carry a camera with 70-200 f/2.8 lens attached providing the hood is reversed along with several other lenses. Just keep in mind the insert goes in the top compartment. All that gear will be adding a lot of weight and you’ll lose use of the top compartment for anything else.
That said, the Rotation 180 Pro can be unzipped from the back so you can get to any additional gear in the main compartment. To get to your gear, you leave the bag on with it buckled around your waist, undo the chest strap, and rotate the bag around. The bag naturally leans forward allowing you to unzip the back open. I appreciated this feature while standing inside a muddy cave looking up at a tree. I needed to get to the main compartment for my headlight, but didn’t want to put the bag down on the ground. I just rotated it around, grabbed what I needed, and zipped it back up.
Tripod Sling
There are many bags allowing you to attach the tripod to the bottom. I’ve never liked this implementation. The weight never feels well distributed; the center of gravity always seems to be shifted to the side where the tripod head happens to be facing.
Mindshift did something unique with the Rotation 180 Pro. The bag comes with a removable sling you can use to carry your tripod. You can leave the sling at home if you’re not taking you tripod along. If you are, however, the sling attaches to the front of the bag keeping the weight close to your spine.
What’s also nice are the two small pockets on the front of the bag that open up to reveal compression straps to secure the middle and top of the tripod to the bag. Mindshift shows how all this works in the video below:
Tripod Suspension Kit
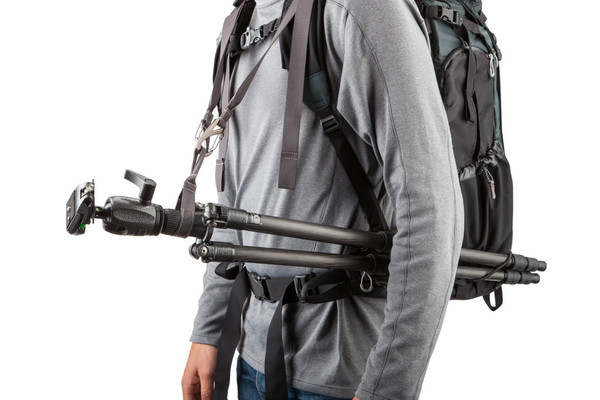
Tripod suspension kit lets you carry and setup your tripod quickly
One thing about the sling: it’s designed for you to carry your tripod as you trek out. When you get to your shooting location, however, you need to be able to carry, and get to, your tripod easily. That’s not something easy to do with it strapped to your back, but the optional suspension kit ($47.50) solves this problem.
The kit consists of three straps: two shoulder harnesses you can attach to the bag and a strap you to attach around the tripod’s center column. From there, you connect the shoulder harness straps to the tripod strap. This allows you to carry the tripod without using your hands. If you’re moving around (let’s say climbing a rock, for example) you can attach the tripod legs to a bungee cord on the side of the bag allowing you to carry the tripod without using your hands. Here’s another Mindshift video showing how this works:
Design: as a Hiking Bag
At 29.63 liters of storage for the top compartment and 7.67 liters for the belt pack. The Rotation 180 Pro is designed for a 1- to 2-night trip. It weighs 5.3lbs and is 13.5″ W x 22.5″ H x 10.5″ D. I’d call it a mid-sized bag. It is larger than a typical backpack (like Canon’s deluxe backpack), but not overwhelmingly so like a mountaineering pack.
Pockets & Compartments
The pleated front of the bag camera bag has enough room for a pair of pants and a jacket which is nice- especially if you start hiking early and need to layer up. Being in Florida, though, this compartment usually stays empty – at least in the summer as the mornings here start out hot and just get hotter.
The left side of the top compartment has enough room for a 100oz (3 liter) water reservoir, which you have to purchase separately. I went with the Camelbak Antidote Milspec reservoir. It’s a bit on the wide side for the bag, but works well; the 100oz Camelbak Omega is a good option also. I liked the milspec reservoir because it is ribbed and does not misshape as it gets full like a typical reservoir. The reservoir compartment has a strap to allow you to hang the water bladder and there is a slit in the compartment for you to thread the hose through. Also on the left side is a mesh pocket which you can use to carry bug spray or whatever items you might need. The mesh pocket gets a bit tight if the water reservoir is full, but it is handy. The ride side of the top compartment has a small pocket for storage which is ideal for the rain cover.
The Top Compartment
You’re not going to get the cavernous space you normally would get from a hiking bag since the bottom of the bag is dedicated to the belt pack. However, you can carry a cookset, camping stove, propane, water filter, and some food. The compartment has two pockets for smaller items. There’s also an optional top pocket ($32.99) that can be attached to the top of the compartment if you need to carry small items like energy bars. It can even be used to attach rope or a jacket.
A quick note on accessing the top compartment: not only can you unzip the back as I mentioned earlier, you can also open it up from the top as well.
Carrying a tent/Sleeping bag
The optional Attachment Strap kit ($16.95) comes with two 16” adjustable straps and one 39” strap allowing you to attach a tent/sleeping bag/whatever else you might need to the bottom of the bag.
Straps
The Rotation 180 has the full complement of straps, and strap adjustments, one expects from a solid hiking bag. Each shoulder strap can be adjusted at the top and bottom allowing for perfect positioning and weight distribution. The sternum strap moves along a rail for easy adjustment. The shoulder straps, bag back, and the belt back straps are thickly padded and very comfortable. All the straps (with the exception of the sternum strap) have an elastic loop allowing for management of strap excess.
The belt pack strap has a side pocket to hold smaller items. If there’s one thing I would improve on the Rotation 180 Pro, it would be this pocket. It could be a bit bigger and not so far to the left. Its size and positioning makes it difficult to use and get to. That said, it’ll fit a small flashlight and memory cards if needed.
Rain Cover
As I mentioned earlier, the Rotation 180 Pro has two. They’re both well made, but it’s a bit tricky to get the main bag’s rain cover on as it has specific attachment points inside the bag to allow for the ability to rotate the backpack in and out while the cover is on. It’s not that difficult to figure out once you’ve done it once or twice, but I’d recommend putting the main bag’s rain cover on a couple of times at home so you can do it quickly if you’re caught in a rainstorm. Putting on the belt pack’s rain cover is a breeze. Mindshift has a video showing how to put the rain cover on:
Price and Options
The Rotation 180 Pro comes in two configurations: Standard and Deluxe. Here’s a quick breakdown of what you get with each configuration:
Standard Edition ($389)
- Rain Covers
- Tripod Sling
Deluxe Edition ($499)
- Rain Covers
- Tripod Sling
- r180 Pro Insert
- Tripod Suspension Kit
- Top Pocket
- Attachment Straps.
Should you Buy It
At $389 for the Standard edition and $499 for the Deluxe, the Rotation 180 Pro is not cheap. The price is up there, and the accessories (if you go with the Standard Edition) are not cheap either. It’s not a bag you need for running around your downtown, but if you’re looking for a bag to entrust your gear to as you venture into the wild, the answer to “should you buy it” is a resounding yes – especially if you make multiple trips per year.
If you’re price conscious and are willing to carry a little less gear, you might want to consider Mindshift’s Panorama 180. It features the same rotating design and goes for $199. It’s smaller but still gives you many of the benefits of the Pro version.
The Rotation 180 Pro is comfortable to wear (even when loaded down with gear), has room for your camera and hiking gear, and makes using your camera a breeze when conditions are such that getting to your camera is not something you should have to struggle to do. The rotating design is so well implemented it’s a wonder no one thought of it before.
Where to buy
Mindshift Gear: Rotation 180° Pro
Amazon: Rotation 180° Pro- Standard
Amazon: Rotation 180° Pro- Deluxe Kit
B&H: Rotation 180° Pro- Standard
B&H: Rotation 180° Pro- Deluxe
Jun
11
2013
Why this matters
Choosing a 35mm lens used to be easy for Canon shooters. If you needed to freeze action, you bought the Canon 35 f/1.4L. If you could afford to lose a stop, you bought the Canon 35 f/2L IS and saved a significant amount of money. The 35 f/2 isn’t as fast as the 1.4L but you’d have IS.
Life couldn’t stay simple forever though; the release of the Sigma 35 f/1.4 DG HSM complicated things. It’s as fast as the 35L but doesn’t cost too much more than the 35 F/2 IS. If you’re strictly looking for a 35mm f/1.4 the decision just isn’t clear anymore. You may be thinking about the Sigma but let’s face it, it’s a Sigma and it is weighed down by the history of Sigma lenses. Will it focus? How durable is it? What’s the image quality like? Can it be as good as good a lens as the 35L? On the other hand, is the Canon L that much better than you shouldn’t even look at the Sigma?
To answer these questions I pitted the Canon 35L against the Sigma 35 f/1.4 DG HSM and looked at their strengths and weaknesses to help others make the decision.
Construction
Both lenses are well-constructed and neither feels “cheap”, though the Canon’s construction feels more robust than the Sigma’s. The Canon also has the magical L red ring that lets lets every photographer in the immediate vicinity know you’re sporting a “pro” lens. It won’t make your photos any better, but they don’t know that. Kidding aside, if your lens choice depends greatly on survivability, go with the Canon. The build quality is what you’d expect from an L Lens: solid. Another thing to factor-in here is Canon’s reputation for repairs vs. Sigma’s. Sigma has made strides to improve service, but it’s hard to beat Canon’s factory repair (especially if you’re a Canon Professional Services member)
Notwithstanding, the Sigma 35 does not come across as a cheap second-rate lens as Sigmas tend to. The lens is very well-made and its metal-plastic exterior with satin finish is well-executed. It looks, and feels, like a high-end product.
Weight
The Canon 35L is the lighter of the two weighing in at 580g or 1.28lbs. The Sigma clocks in at 665g or 23.5oz. I don’t think the weight difference is perceptible – though some may disagree. I should note I was not aware of a weight difference until I looked up the specs for this review.
Weather Sealing
Neither lens is weather sealed. If this is important to you, you may want to take a look at the 16-35 f/2.8LII. I encountered a couple of rainstorms during the testing period and I was frustrated by not being able to reach for the 35s. Luckily the 24-105 f/4L is weather sealed and I was able to reach for that.
Image Quality & Sharpness
Wide open the Sigma is significantly sharper. Take a look at the 100% RAW crop below (Canon left, Sigma right) and note the eye definition. Both images were captured with a 5DMKII at ISO 800 and imported into Lightroom without any noise reduction or sharpening.
Canon-Sigma Side-by-Side Comparison at f/1.4

RAW comparison @ 100% at f1.4 Canon (left), Sigma (right)
The Sigma remains sharper until about f/2.8. At this point, both lenses are almost identical. In terms of vignetting, and chromatic aberrations, both lenses perform very well. Chromatic aberrations are well-controlled and barely noticeable. While vignetting is apparent at 1.4, it does subside (but does not completely disappear) at about f/2.8. Speaking of aperture, the Canon’s minimum aperture is f/22 while the Sigma’s is f/16.
Focus
Focusing speed was similar and I didn’t note a difference between the two lenses. I do think focus on both lenses is slower than typical Canon L lenses (like the 24-105 f/4L or 70-200 2.8L).
The focus rings on both lenses have a nice weighty feel. They’re both smooth enough to move but solid enough to prevent accidental movement. I was worried about slack in the Sigma, but there was none to be found.
In terms of focus lock, while focus lock is largely driven by the camera’s autofocus system, I tested it nonetheless as there is always concern with 3rd party lenses. Low-light focus was tested under two real-world conditions: a dark room similar to a wedding reception banquet hall and outdoors under dim city street lights. I performed the tests twice making sure to use both lenses each time. There was no difference between the two – neither hunted while the other locked. Low-light focus should not be considered a factor when deciding between the two lenses.
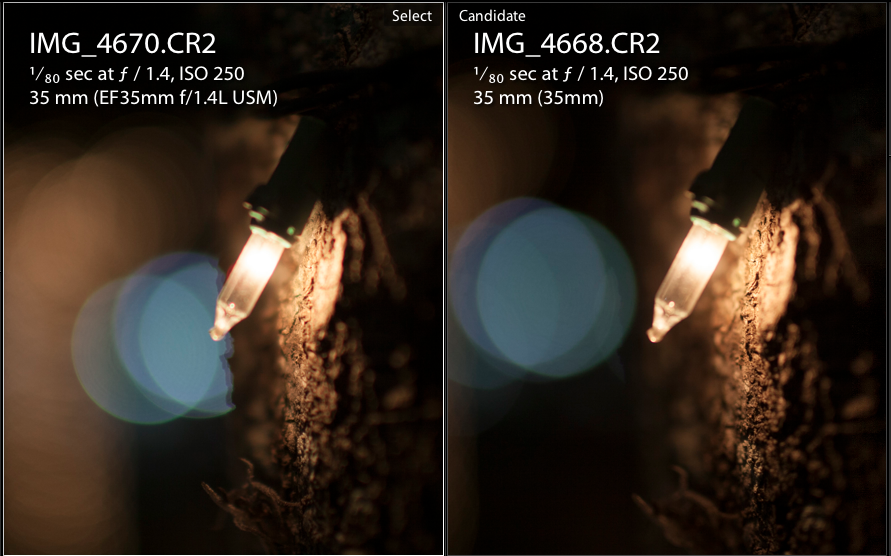
Bokeh
35mm lenses are not the bokeh machines 85mm lenses are. Nonetheless, one should have some idea of what bokeh is like when buying an f/1.4 lens. Below are two images shot wide open. As in the earlier comparison, the Canon is on the left while the Sigma is on the right. I believe the Canon’s Bokeh is the creamier, smoother, “butterier” (this shouldn’t be a word), (insert adjective here) of the two – especially in the shape of the “bokeh balls”. Keep in mind, I wasn’t on a tripod here and the test wasn’t completely controlled, however, I did note that bokeh was more pleasing in the canon overall on multiple occasions.
The Gestalt aka: the “living with it test”
Both lenses are top performers, but the Sigma is markedly sharper. When I wanted the shot, I reached for the Sigma. In the end, it was that simple for me. I liked the Canon L but I just couldn’t reach for it to shoot wide open. That said, the Canon is no slouch especially at f/2.8 and up. If you’re rough on your gear or are working in an environment where you need an a robust body the 35L is the way to go.
In the end, the Sigma 35 remained in my bag. Below are some of the recent shots I’ve taken with it. It’s a fantastic performer that’s hard to match wide open.

Buy:
The Canon 35 f/1.4L and the Sigma 35 f/1.4 DG HSM are both currently available from B&H.
Rent:
If you’re the type to try before you buy (or just want to double check this review), you can rent Canon 35 f/1.4L and the Sigma 35 f/1.4 DG HSM from BorrowLenses.com.
May
22
2013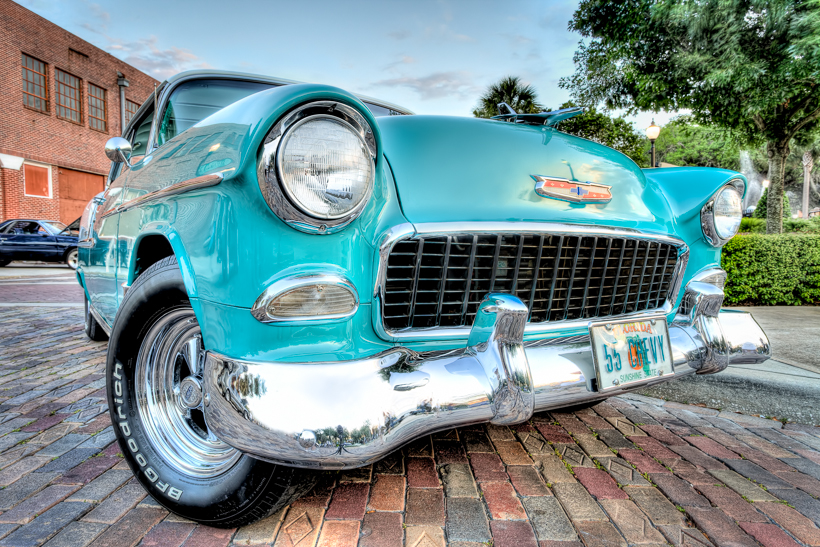
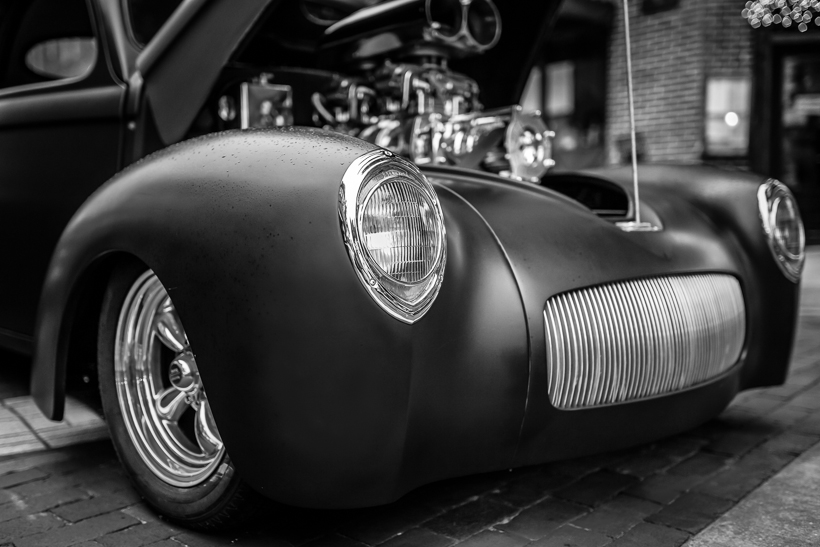
1955 Chevy Bel Air – created with Photomatix, Lightroom, Photoshop & Topaz Clarity
What Is It?
Topaz Clarity is a plugin that allows photographers to make color, contrast, and clarity definition adjustments without halos or artifacts.
Does it do it well?
Topaz is no stranger to controlling halos. Their Detail plugin is one of my favorite sharpening tools because it does not create halos at edge boundaries. But that’s Detail, what about Clarity?
In short, the technology does a great job. I have some reservations about some bugs in the user interace I hope Topaz will address in the future, but those are minor issues; the technology itself works, and it works well. Take a look at the before (left) and after (right) below:
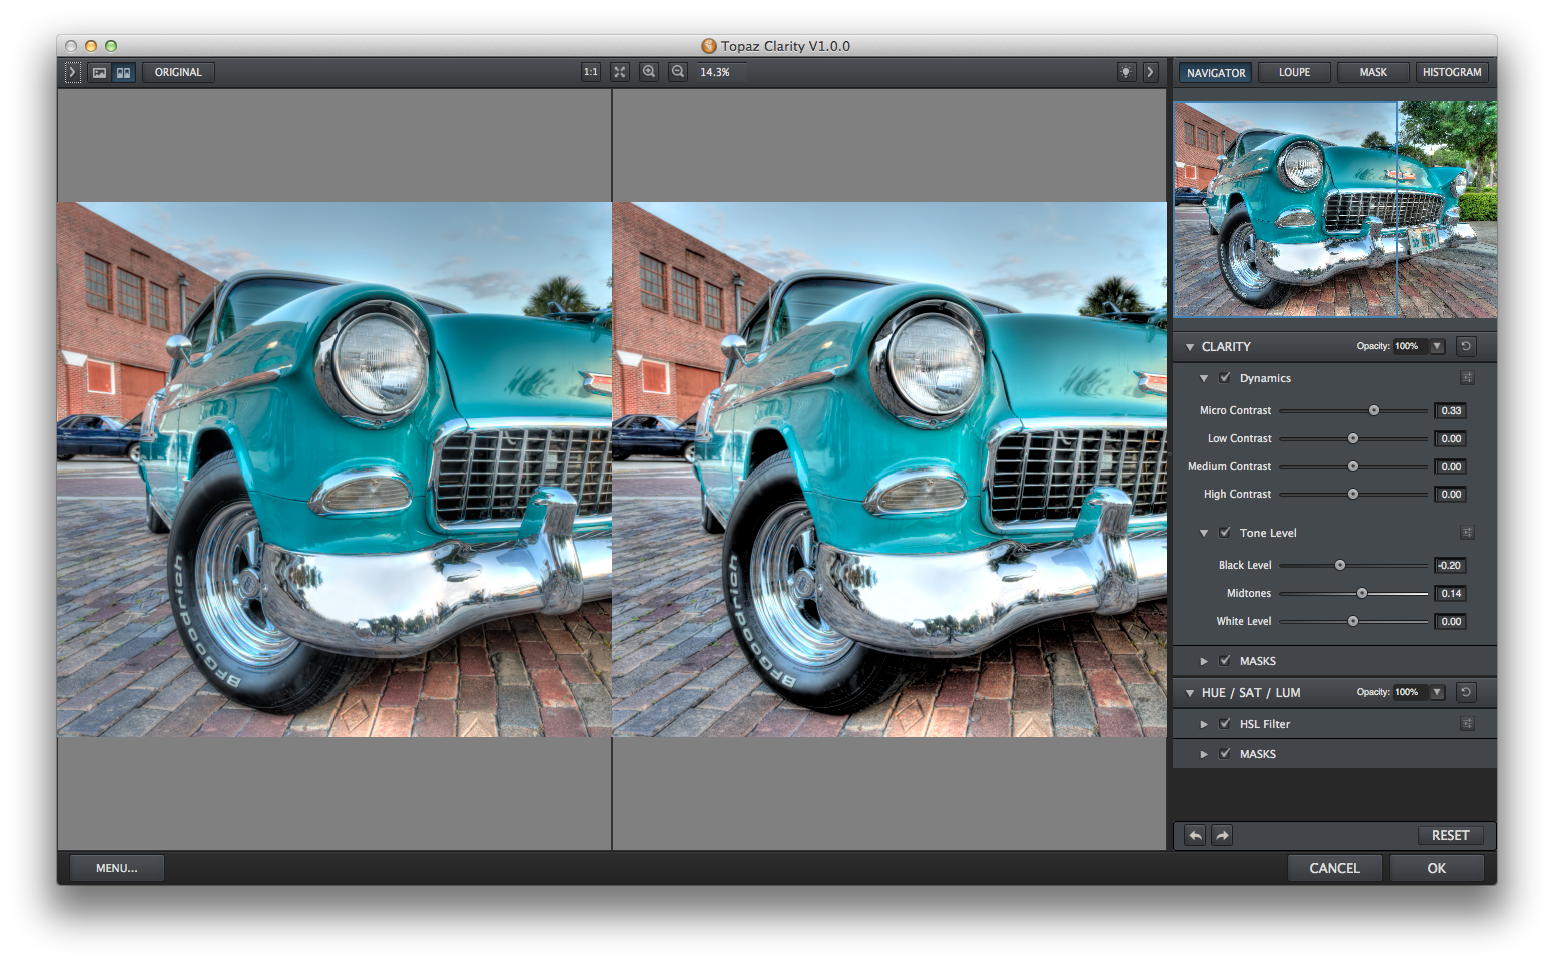
Topaz Clarity Before & After
Is it perfect? I do see a bit of haloing, but it is so slight that it’s easily addressed with the masking brush Topaz makes available. That’s a real nice feature allowing you to brush-in/brush-out the effect as desired.
For HDR
Tonemapped images always need a contrast boost. I like the fine tune control over Micro, Low, Medium and High Contrast. Clarity is like a contrast scalpel providing you with control when you want it.
Features
In addition to clarity and contrast, you also get Hue Saturation and Luminance controls, as well as, a good list of presets to get you started. The presets themselves are broken down into collections like Documentary, Landscape, Fashion, Wedding and so-on to give you a head start depending on the type of photography you do. You can also create your own as is expected.
Another nice feature with the masking brush is a preview showing you where the brush has been applied. Think layer masks in photoshop, but large enough for you to see where the brush was applied. I’d like to see something like that get incorporated into Lightroom & Photoshop.
Is it worth it?
Topaz will be selling Clarity for $49.99 but has it discounted to $29.99 until May 31st. That’s not a bad deal for the kind of fine tuned control it gives you. Skip a few cups of coffee and give it a whirl. If you can skip coffee for a while, the Topaz Bundle has a great set of tools like Adjust, Denoise, and Detail (to name a few). By the way, if you’re interested in Denoise, checkout my video tutorial here.
Ok, it’s new software, are there any bugs?
There are a few bugs with the UI. If you’ve used Lightroom, you’ll notice similarities between it and Clarity. The layout of the HSL sliders for example is definitely an homage to Lightroom, but some of the UI functionality is a bit buggy (at last in the Mac version at release). The brush, for example, doesn’t repsond to the a two-finger drag to resize and the “[” and “]” keys don’t always the resize brush when clicked. Also, Command-Z doesn’t seem to undo brush strokes.
These are minor issues I’m sure will be addressed in time, but they’re there. The core functionality does work well, and if you’re looking for fine grain clarity control Topaz Clarity is a good one.
Anything else?
You can try it for free for 30 days, give it a shot and let me know what you think in the comments.
Apr
19
2013
-

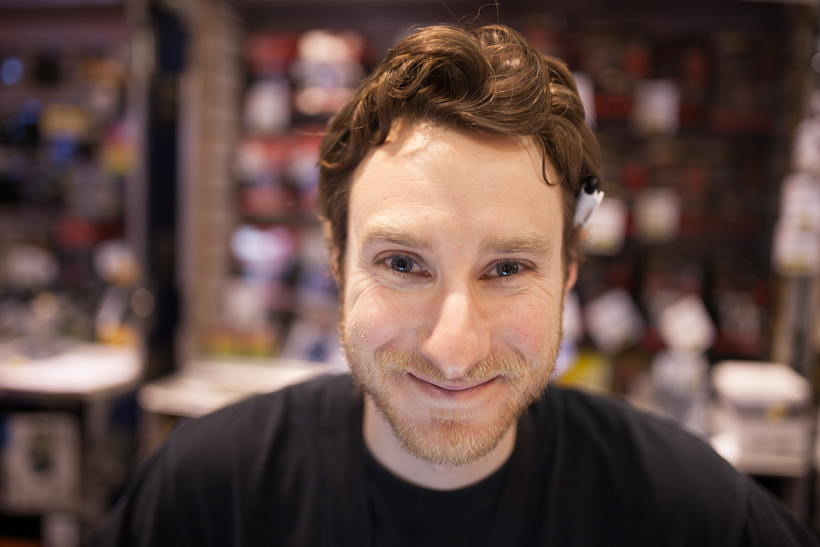
- Cool guy from MidwestPhoto who posed for a portrait to let me test the lens
-

- That’s me at f/1.4
-

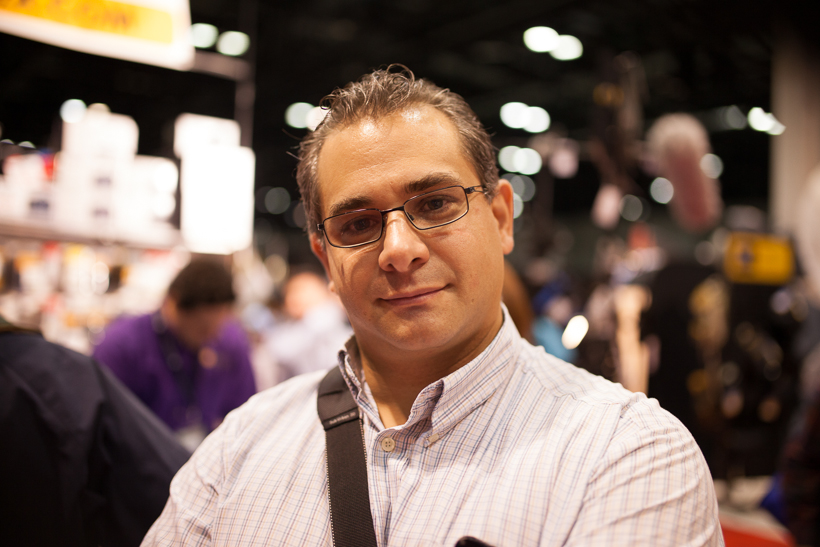
- Light wasn’t great on the floor at PSW
-

- A shot af f/1.4

-

- A shot at f/4.0

-

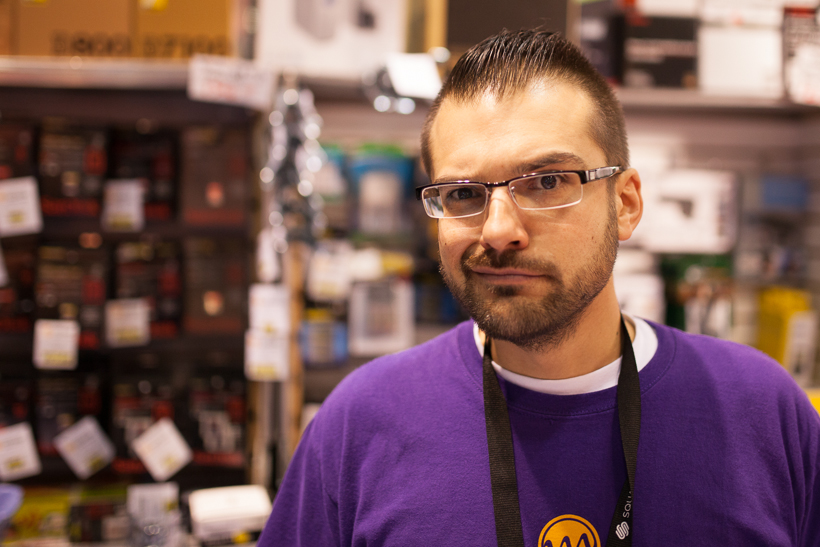
- Shot showing autofocus lock in very low-light

I picked the Sigma 35 F1.4 DG HSM for Canon at Photoshop World earlier today. I posted about it on Google+ and was asked how its autofocus performed in various situations.
Now, I plan on putting the lens through its paces in the next couple of days so I can’t yet give a definitive answer, but for now here are some first impressions with an album of some images I captured today. Other than some cropping, and maybe a white balance adjustment, the images are not touched/edit in any way at all.
Overall the Sigma’s AF performs well. It does focus slower than my canon Ls, but it is not so slow that I feel I’m waiting on the lens. It’s just a bit slower.
In terms of hunting in low-light, I can’t say it hunts more than my canons do. The lead image in the album is from the floor of Photoshop World. As you can see, several of the images were from the expo floor at Photoshop World. Light wasn’t great, but the lens had no issues focusing.
I also have an image later on in the album of my son sitting in a dark room. I didn’t notice the lens hunting more than my other lenses.
As for build quality, it’s excellent. The lens sports an all metal barrel and a matte finish. It feels weighty but not heavy and the focus ring is smooth. It’s a 3rd party lens that doesn’t feel 2nd rate in any way.
Finally, in terms of sharpness. It is sharp, very sharp, and I love seeing the images it captures.
More to come soon. I’m planning a head-to-head with the canon 35L in a few weeks. I’ll write more in the next couple of days after I use the lens regularly for a good amount of time.
Checkout this lens at B&H or Amazon if you’re thinking of picking it up.
Dec
13
2012
You might worry when a company like ThinkTank lists zipper specifications in descriptions of its CityWalker line of messenger bags. After all, when was the last time you went shopping for YKK® RC Fuse (abrasion resistant) zippers?
At first glance you might think: “Wow, zippers!! Are zippers a bragging point?!”
You might think that, but after using the CityWalker (I have the CityWalker 30) you realize ThinkTank brags about the zippers it uses because it cares about details. But, before I get to the review, let me back up to why I’m even talking about this bag at all.
So why this bag?
Teaching workshops presented me with an unexpected problem: I need to carry my 15″ Macbook Pro and a 5DMKII. Sounds simple enough, right? I started by carrying a small backpack and a walkaround camera bag. This seemed like a good idea, but there I was with backpack straps on each shoulder, a camera bag strap on one shoulder, and a BlackRapid strap on the other shoulder. If that wasn’t ridiculous enough in itself, I needed to make sure I put the assorted bags/straps on in exactly the right order or I would find myself unable t o bring my camera up to my eye or move my camera bag around because I was entangled in assortment of straps. The CityWalker solves this problem: one bag instead of two and a max of two straps at any time.
Which one is right for me?
A messenger bag may be what you need, but ThinkTank has 3 CityWalker models: the CityWalker 10, 20 and 30. What’s the difference? In a nutshell:
Citywalker 10 carries: Camera body with a 24-70 attached, a second small lens, flash, and a tablet
Citywalker 20 carries: Camera body with 24-70 attached, 70-200mm lens (detached) , flash and a tablet.
Citywalker 30 carries: Gripped full-frame camera body with 24-70 attached, 70-200mm, detached, flash and 15″ laptop
You should be getting the sense of small, medium and large at this point. Keep in mind the above is a rule of thumb. ThinkTank rates the CityWalker 10 for one 24-70 with one extra lens & flash, CityWalker 20 for 24-70 with 1-3 extra lenses & flash, and the CityWalker 30 for 24-70 with 2-4 extra lenses & flash.
Here’s what I managed to fit in my CityWalker 30:
 |
List of Contents:
Canon 5DMKII – gripped Canon 50D – gripped Canon 24-105mm f/4L attached to camera with hood Canon 17-40mm f/4L (hood attached) Canon 70-200mm f/2.8L (hood reversed) Canon 430EXII flash 15″ Macbook Pro BlackRapid Strap Assorted other small accessories |
Using the CityWalker 30
The strap is nice and wide with embedded no-slip pads and the shoulder pad slides allowing you to reposition the bag on your body. Also, the bag stands up easily when it’s set down on the ground. Keep in mind, there are no spacer nubs, so when you put the bag down it’s touching the ground. This is not a big deal for me as I prefer not having nubs (I’ve always found them to unbalance bags), but this may be an issue for some.
Removable Padded Insert: The camera and lenses fit in an insert, but if you want a more streamlined bag, the insert can be removed. Conversely, this also makes the CityWalker more versatile allowing it to hold a wind breaker or perhaps be used as an overnight bag. As an aside, the insert is well-secured by velcro and is not easily jostled.
Sound Silencers: This is a nice detail; the front cover has a buckle and can also be velcroed shut by two flaps on either side of the buckle. But, let’s say you want to keep a low sound profile when opening the bag. For this ThinkTank provides covers that go over the velcro leaving you with only the buckle to keep the front cover shut.
Dedicated laptop compartment: your laptop doesn’t just get thrown into the bag, there’s a separate compartment with its own flap within the bag. This protects the laptop from being scratched by your gear (and vice versa.)
Additional Details:
Rain cover: ThinkTank includes a seam-sealed rain cover should you get caught in an unexpected rainstorm.
Business card holder: I can’t tell you how many times folks ask me for business cards while I’m out shooting and it’s nice to have a dedicated pocket within easy reach.
Exterior Mesh Pockets: I like to keep a water bottle with me as I’m walking around and talking/teaching; it’s nice the pockets can hold a large bottle.
Colors: you have your choice of blue slate or black.
External Material: The exterior is a durable water resistant 3-ply bonded nylon thread. For added water protection, the bottom of the bag is coated with polyurethane. The details include: YKK® RC Fuse (abrasion resistant) zippers, 420D velocity nylon, 420D high-density nylon, 600D brushed polyester, 250D shadow rip-stop polyester, Derrington™ mesh pockets, antique nickel plated metal hardware, Dual Cross™ Buckle, 3D air mesh and mono mesh.
Internal Materials: PE board reinforced removable closed cell foam dividers, 210D silver-toned nylon, polyurethane backed velex liner, 2x polyurethane coated nylon 210T seam-sealed taffeta rain cover, 3-ply bonded nylon thread.
Sound Silencers & Business Card Holder

CityWalker 30 with Front Flap Shut

Specifications:
CityWalker 10:
Outside Dimensions: 12.4” W x 9” H x 6.7” D (31.5 x 23 x 17 cm)
Inside Dimensions : 10”W x 7.5” H x 5.3” D (25.5 x 19 x 13.5cm)
Tablet: 10.3” W x 8”H x 0.8” D (26.2 x 20.3 x 2 cm)
Weight: 1.9-2.1 Lbs. (0.8-0.9 kg)
CityWalker 20:
Outside Dimensions: 13.8” W x 9.8” H x 6.7” D (35 x 25 x 17 cm)
Inside Dimensions : 13” W x 8.7” H x 5.3” D (33 x 22x 13.5cm)
Tablet: 10.3” W x 8”H x 0.8” D (26.2 x 20.3 x 2 cm)
Weight: 2.0-2.3 Lbs. (0.9-1.0 kg)
CityWalker 30:
Outside Dimensions: 16.3” W x 11.4” H x 8.3” D (41.5x 29 x 21 cm)
Inside Dimensions: D : 13.4”W x 9.6” H x 6.7” D (34 x 24.5 x 7 cm)
Laptop: 15” W x 11”H x 1.4” D (38 x 28 x 3.6 cm)
Weight: 2.7-3.0 Lbs. (1.2-1.4 kg)
Final thoughts:
I chose the CityWalker 30 because I needed a large capacity bag to carry my gear to and from workshops as well as allow me to carry my laptop while walking around shooting. But, do I like it? The answer is yes: It’s a well-crafted urban messenger and ThinkTank’s attention to detail can be seen through its design. It is light, flexible, and built with durability in mind. You may not need a bag as large as the CityWalker 30, but if you do, it’ll definitely do the job and do it well with room to spare. If you can get away with just a tablet, the CityWalker 10 or 20 may be a more compact option for you.
Where to buy
ThinkTank: CityWalker 10, CityWalker 20 & CityWalker 30
B&H: CityWalker 10, CityWalker 20 & CityWalker 30
Apr
04
2012
I’m not a big fan of micro four thirds cameras. A lot of folks look at them as excellent entry-level cameras or alternatives to DSLRs but not me. I look at them as a second camera for serious photographers who do not want to bring along the weight of a DSLR. If you’re starting out: get a DSLR. As you skills improve, and you outgrow slow lenses, invest in quality lenses, then upgrade your camera body as your need for custom setups, high ISO and better auto focus arise. You really can’t do that with a micro four thirds, you’re stuck with the format. Yes, there’s a range of micro four thirds lenses, but the top end lenses in the market are made for DSLRs.
So, why am I writing about the Sony NEX-7? First, it’s not a micro four thirds; the NEX-7 sports a full APS-C sensor. Also, I kind of liked it! I’m not going to trade in my Canon for it and I still wouldn’t recommend it for someone who asks: “I’m starting out in photography, what camera should I get?” But, for a photographer who has an extra $1348 or $1198 for the body only, it’s a great camera if you’re looking to travel light.
What I liked:
- 24.5 megapixel APS-C sensor in a lightweight camera body is nice especially when you want to shoot in public places without drawing too much attention.
- 10 frames per second. Enough said!
- Viewing images in the viewfinder exceeded my expectations. I’m not talking about composing images, I’m talking about seeing images you just captured. I can’t explain it, but images almost look like they’re 3D. It’s magical in an Apple-esque sort of way. You really have to see it to appreciate it.
- Articulating screen is handy when you want to shoot down low but don’t want to get down and dirty.
What I didn’t like:
- The viewfinder is grainy in low light. Remember, there’s no mirror so it’s not an optical viewfinder; it’s electronic and you will see ISO noise as you’re trying to shoot. It’s a bit disconcerting seeing ISO noise jump around as you look through at your scene.
- Ergonomics are still an issue for me. Mind you, I didn’t spend hours with the NEX-7, so perhaps this is a function of too little time, but I’m not yet convinced the ergonomics are there. There is something to be said for the DSLR fit in your hand.
- While there are adapters to allow you to mount just about any lens to the NEX-7, you will invariably lose some image quality. It will be interesting to see what comes from the manufacturers in the next few years but for now, I still think you’re going to need to buy into lenses designed for the form factor.
Would I buy it?
This would be a shock to some of you who follow me on google+, but yes I would if my requirement was lightweight body that produced high quality images. It’s great for trekking around the back country or for taking on a vacation (think theme parks). When you want to go light without sacrificing image quality the NEX-7 is a great choice.
This would be a shock to some of you who follow me on google+, but yes I would if my requirement was lightweight body that produced high quality images. It’s great for trekking around the back country or for taking on a vacation (think theme parks). When you want to go light without sacrificing image quality the NEX-7 is a great choice.


