HDR Tutorial – Part 2: The HDR Toolset
| < Go to Part 1: What is HDR Photography? | HDR Tutorial Navigation | Go to Part 3: HDR With Photomatix > |
HDR Tutorial Part 2: The HDR Toolset
You’re still here, awesome, let’s dive in. In this part, I’ll introduce the image we’ll be working on and the tools you’ll need to get going with HDR. Let’s start with the image we’ll be creating:
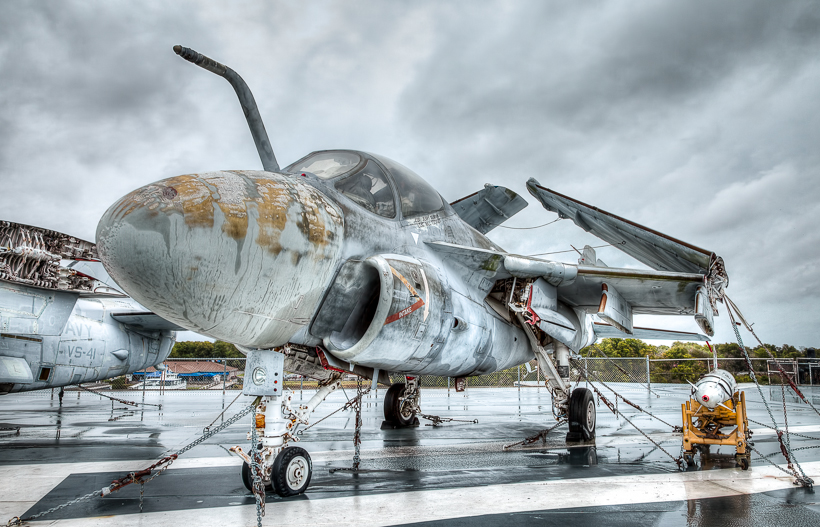
Decomissioned A-6E Intruder – a 3-image HDR will be the photo we’ll be creating in this HDR tutorial
Now to the necessary tools, below are what you’ll need along with some thoughts on each item. I start with the tripod & head, but if you already have a solid tripod setup, skip down a couple of bullet points to Photomatix.
- Tripod (required)
- Tripod Head (required)
- Photomatix (required)
- Photomatix from HDRSoft is the tool you’ll need to mix your images. It comes in a couple of flavors. The one to get is Photomatix Pro. It’s $99, but well worth it as it is the HDR tool against which all others are measured. Use the coupon code certainpointofView for a 15% discount.
- HDRSoft sells Photomatix direct from their site here.
- You also have the option to try it free for 30 days before buying if you want to dabble before diving in.
- Adobe Lightroom (recommended)
- You don’t need Lightroom for HDR, but if you’re serious about photography, you are going to want it in your toolset. Lightroom helps you organize your images and make adjustments; I find that it’s an indispensable tool.
- Lightroom is about $125; you can download it from Amazon and get up and running pretty quickly.
- Topaz Denoise (recommended)
- HDR images are prone to noise so you will need to develop your noise-reduction skills. Lightroom does a pretty good job, but Topaz Denoise is just plain better. You can check out my video tutorial of it here (it’s almost an hour long so you may want to tackle it later on.) In the tutorial I also talk over camera setup to keep noise low; check it out when you get a chance.
- If you decide to spring for Topaz Denoise, you can pick it up here. My thoughts on this is: see what you can do with Lightroom first. If you you’re still having issues with noise, go for Topaz Denoise or perhaps the Topaz Bundle which is significantly more expensive, but comes with other tools you will want to utilize later on.
- Topaz Detail (recommended)
- This is an awesome sharpening tool that I didn’t use much initially but more-and-more I find myself going to it as I finish my images. What’s cool about Topaz Detail is, unlike other tools, it controls sharpening halos and artifacting well.
- You can pick up Topaz Detail here (it’s also part of the Topaz Bundle).
- Topaz Adjust (recommded)
- I think of Adjust as the HDR fine tuning tool allowing you to fine tune exposure, contrast and color. Like Detail and Denoise, it is part of the Topaz Bundle. You can pick it up on its own here.
- Photoshop or Photoshop Essentials (recommended)
- Last, but not least, is Photoshop. I listed Photoshop as recommended, but honestly, I think you’re going to need it long-term. It’s not cheap (~$600), and you may just be able to use Photoshop Elements which is under $100.
- Take a look at Photoshop here or Photoshop Elements.
Ok, those are the tools. At minimum get yourself a tripod and Photomatix Pro. Now, let’s get on to creating the image.
| < Go to Part 1: What is HDR Photography? | HDR Tutorial Navigation | Go to Part 3: HDR With Photomatix > |